
Elegant Crochet Graduation Cap Decoration (Free Pattern Guide)
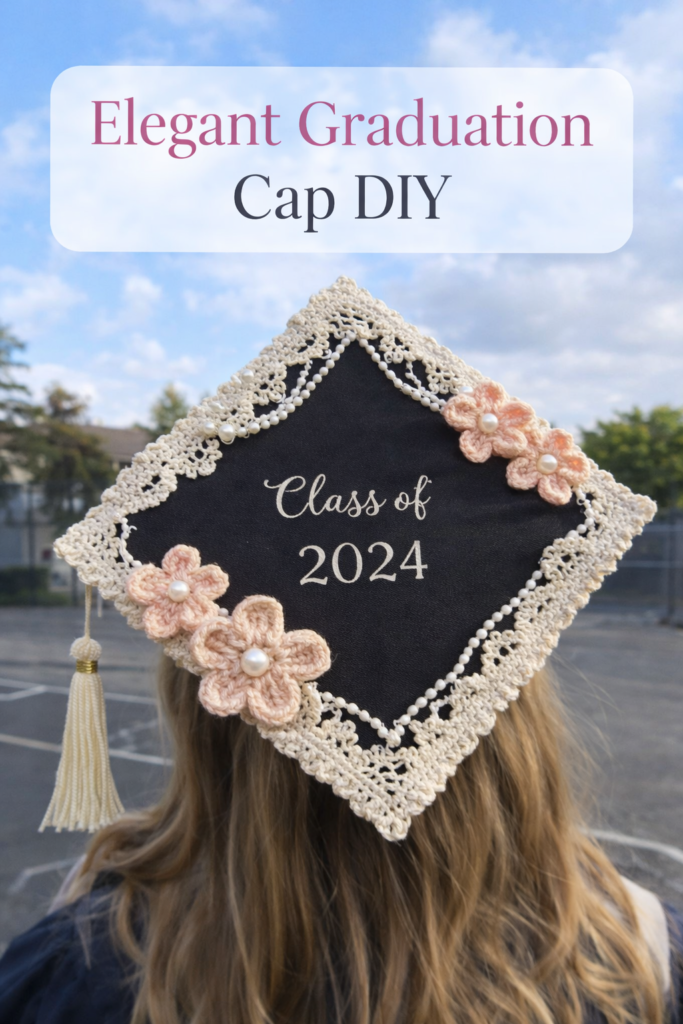
A crochet graduation cap decoration is a beautiful way to personalize your mortarboard for graduation day. This elegant lace border with delicate crochet flowers creates a soft, timeless look that photographs beautifully and feels meaningful.
This pattern includes:
- Crochet lace edging
- Mini 5-petal flower pattern
- Assembly instructions
- Size adjustments
- Finishing tips
Skill Level: Easy to Intermediate
Time: 2–4 hours
Finished Size
Designed to fit a standard 9 x 9 inch graduation cap (23 x 23 cm).
The lace strip measures approximately 36 inches long when lightly blocked.
Why Crochet Graduation Cap Decorations Are Trending
Searches for graduation cap DIY ideas have increased massively on Pinterest. Handmade decorations are especially popular because they:
- Feel personal and meaningful
- Look unique in photos
- Add texture and depth
- Are customizable to school colors
Crochet lace brings a soft vintage aesthetic that photographs beautifully in natural light.
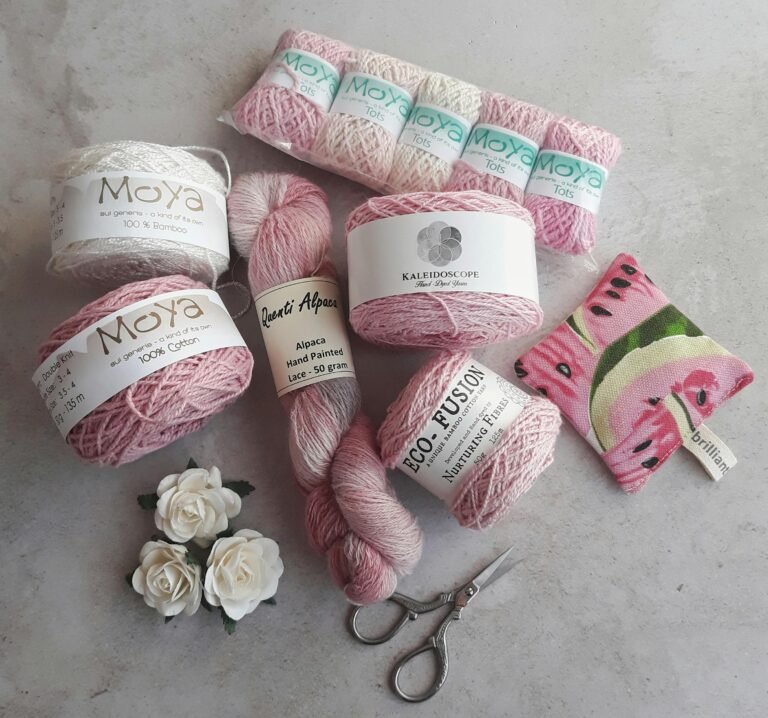
Materials Needed
To make this crochet graduation cap decoration, you will need:
- 100% cotton yarn (lace weight or fingering weight)
- 2.5 mm or 3 mm crochet hook
- Pearl beads (4–6 mm)
- Sewing needle
- Strong glue (E6000 recommended)
- Scissors
- Graduation cap (standard 9×9 inch square)
Optional:
- Cream tassel charm
- Extra pearl chain trim
Part 1: Crochet Lace Border Pattern (Free Pattern)
This lace will go around the edges of your cap.
Abbreviations:
- ch = chain
- sc = single crochet
- dc = double crochet
- sl st = slip stitch
- picot = ch 3, sl st in first ch
Foundation
Ch 180 (or measure around your cap edge — approximately 36 inches).
Row 1:
Sc in 2nd ch from hook and in each ch across.
Row 2:
Ch 3 (counts as dc)
Skip 1 stitch
Dc in next stitch
Ch 1
Repeat across.
Row 3 (lace row):
Ch 1
Sc in first stitch
Ch 5
Skip 2 stitches
Sc in next stitch
Repeat across.
Row 4:
In each ch-5 space:
(Sc, ch 3, picot, ch 3, sc)
Fasten off.
You now have a delicate crochet lace strip.
Part 2: Crochet Flower Pattern (Free)
Make 3–5 flowers.
Magic Ring
Round 1:
Ch 1
10 sc inside ring
Sl st to first sc.
Round 2:
(Ch 2, 3 dc, ch 2, sl st in next stitch)
Repeat 5 times.
Fasten off.
Sew a pearl bead in the center.

Part 3: Assembly Instructions
- Glue lace around the edges of the cap.
- Glue pearl chain inside the lace frame.
- Attach flowers to one corner.
- Allow 24 hours drying time.
Make sure nothing blocks the tassel button in the center.
Color Combinations That Go Viral
- Ivory + soft peach
- White + baby pink
- Cream + gold pearls
- All-white minimalist
If your school colors are navy and gold, try navy flowers with gold beads.
Frequently Asked Questions
How long does this crochet graduation cap decoration take?
2–4 hours depending on experience.
Is cotton yarn better than acrylic?
Yes. Cotton gives structure and looks more elegant.
Can I wash it?
No. Remove lace before washing cap.
Adjusting the Size
If your cap is slightly larger or smaller:
- Add or subtract chains in multiples of 2.
- Always test length before starting Row 1.
- Block lace lightly for accurate measurement.
Yarn Substitutions
You may use:
- Mercerized cotton for shine
- Bamboo blend for softness
- Light acrylic (less structured but workable)
Avoid bulky yarn — lace weight works best for an elegant crochet graduation cap decoration.
Final Thoughts
This crochet graduation cap decoration is timeless, elegant, and meaningful. Whether you’re making it for yourself, a daughter, or a client, it will stand out beautifully in graduation photos.
Handmade details always feel more special than store-bought decorations.
If you make one, tag your design and inspire others to celebrate creatively.
✅ INTERNAL LINKS (for RankMath)
- Crochet lace pattern tutorial
- Crochet flower tutorial
- DIY crochet accessories category